
Rotax 185 CC aircraft engine disassembly cylinder head, cylinder removal
Rotax 185 - Cylinder head removal
Tools required
13 mm socket
ratchet
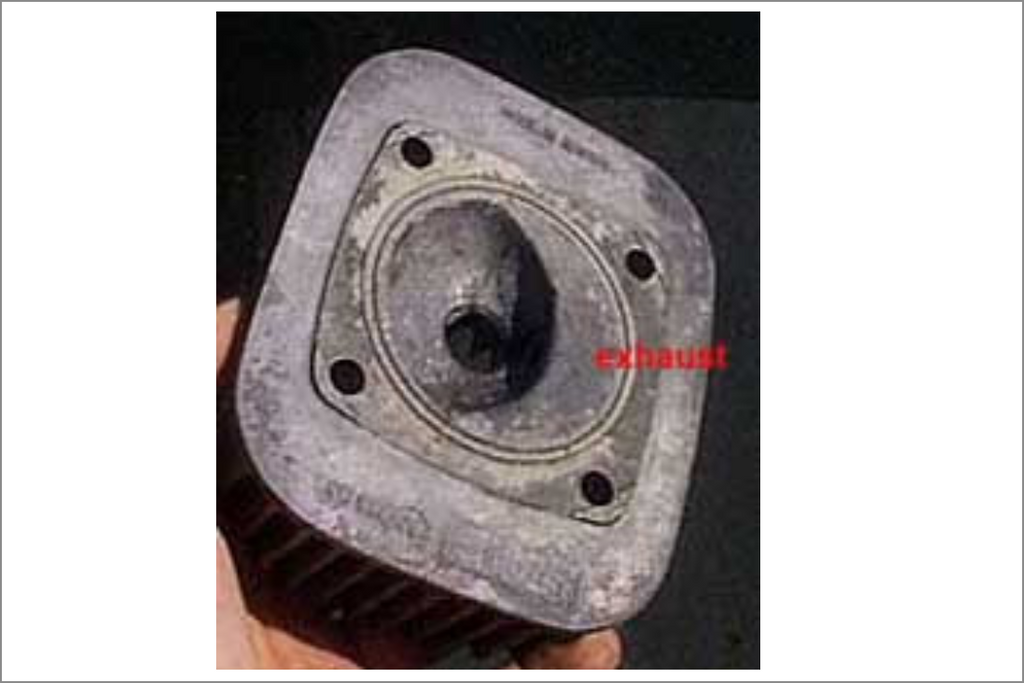
Cylinder head removal
To remove the cylinder heads, disconnect the spark plug wire, and remove the spark plug, remove the 4 nuts and flat washers located inside the cylinder head.
The cylinder head will now lift off.
Inspection:
-Inspect the interior dome of the cylinder head for signs of damage.
-Inspect the head gasket for signs of leakage
-Inspect the cylinder head spark plug threads for signs of damage
-Inspect the spark plug for colour of burn.
-Inspect top of piston for carbon build up.
Rotax 185 - Cylinder Removal
Tools required
Hands, fingers
Rubber mallet
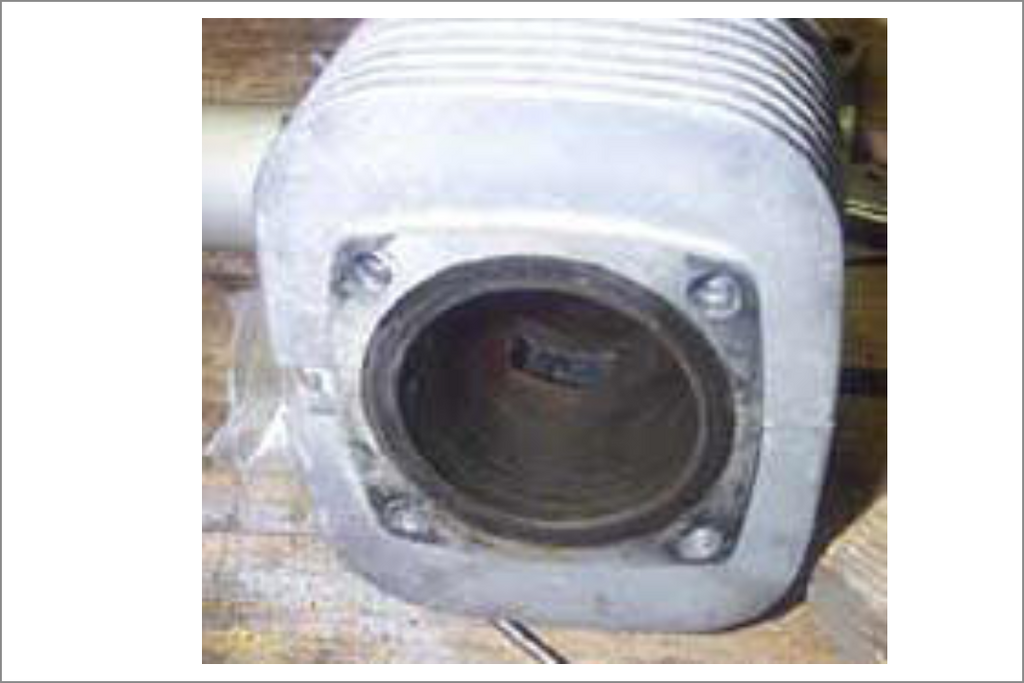
Cylinder removal
To remove the cylinder, grasp the top of the cylinder with your hand and gently lift up. It may be necessary to gently tap the cylinder at the base, with a rubber mallet to break it free from the cylinder base gasket.
Caution: When removing the cylinder be careful that the piston and rod assembly are not allowed to bang against the side of the crankcase or cylinder retaining bolts.
Inspection:
-Inspect the interior of the cylinder for signs of wear.
-Inspect the interior of the cylinder for signs of seizure.
-Inspect the decompressor for signs of seizure of leakage.
-Inspect the exhaust port for signs of carbon build up.
-Inspect the exhaust studs for signs of tightness.
-Inspect the carburetor mounting bolts for signs of cracking.
-Inspect the carburetor mounting bolts for tightness.
Rotax 185 - Piston removal, pin and bearing removal
Tools required
-Ice pick or other pointed tool
-Rags
-Eye protection
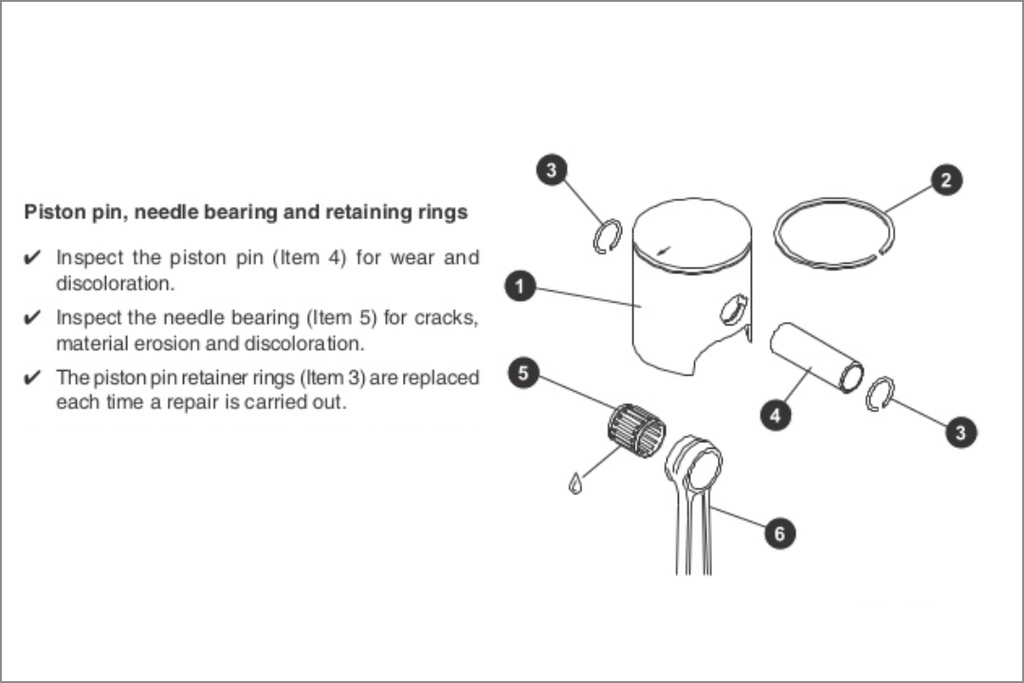
Piston, pin and bearing removal
To remove the piston place the remaining engine assembly on your bench, in such a way as to give you easy access to the piston pin retaining clip.
With an ice pick or other sharp tool, insert it carefully into the cut out in the piston, so that it fits underneath the circlip.
With eye protection on, and a rag in the other hand to prevent the clip from flying free. Pry out on the clip.
With the clip removed, insert a socket into the other side of the wrist pin hole and tap the pin out. Once the pin is free of the connecting rod, the piston and pin can be lifted free. Remove the wrist pin bearing from the connecting rod end.
Inspection:
-Inspect the piston for signs of damage.
-Inspect the piston for signs of seizure.
-Inspect the rings for signs of seizure.
-Inspect the ring lands for signs of damage.
-Inspect the ring dowels for signs of damage.
-Inspect the bottom of the piston for a shiny ring, a sign of wear.
-Inspect the wrist pin for wear.
-Inspect the wrist pin for signs of bluing or heat.
-Inspect the wrist pin for signs of damage, or pitting.
-Inspect the wrist pin bearing for signs of wear.
-Inspect the wrist pin bearing for signs of foreign material.
-Inspect the wrist pin clip retaining groove for signs of wear.
Rotax 185 Aircraft Engine Stator unit removal
Tools required
Flat screw driver
Hammer
Chisel
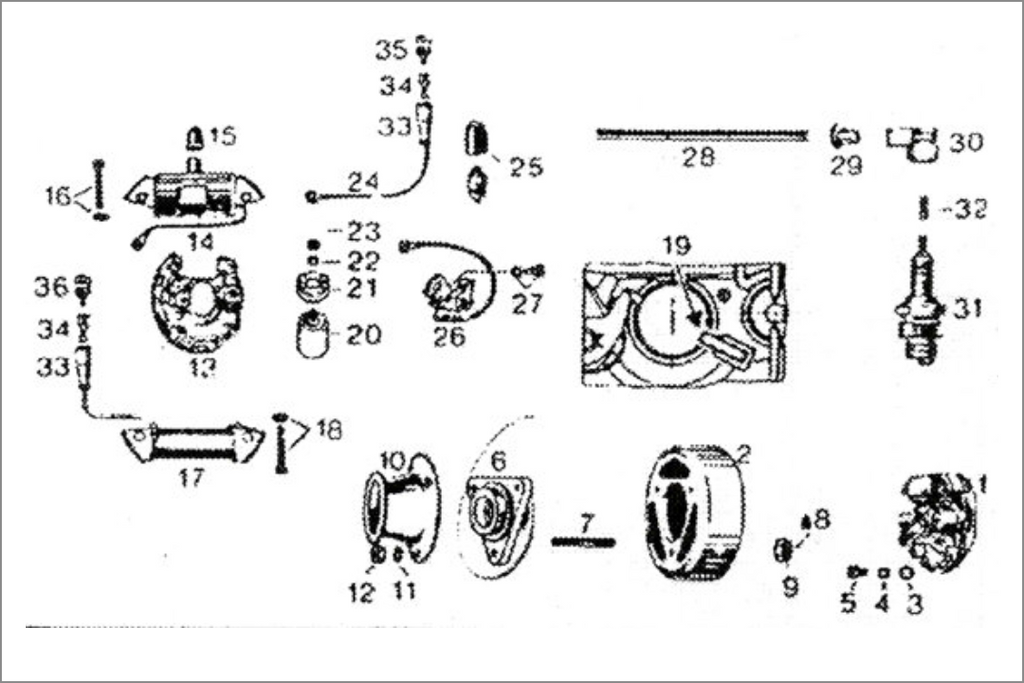
Procedure
Before removing the stator plate take a hammer and chisel and indent a mark in the stator plate and crankcase half. This will aid in timing the engine during reassembly.
To remove the stator unit remove the screws holding the stator to the lower crankcase. Remove the spark plug wire cap from the coil wire. Remove the ignition shut off wire from its connector. Remove the generating wire from its connector if connected.
Gently pull the stator unit towards you while pulling the coil wire through the rubber grommet.
Remove the stator unit.
Inspection:
-Inspect the points for wear or damage
-Inspect the condensers for signs of oil around the sealing surfaces
-Inspect the coil for signs of damage.
-Inspect wiring for signs of pinching or cutting.