Rotax C Drive Installation, Rotax C Drive Oil Level, and Gearbox gear and taper update.
Installing the Rotax "C" Gear Box - Gear Drive
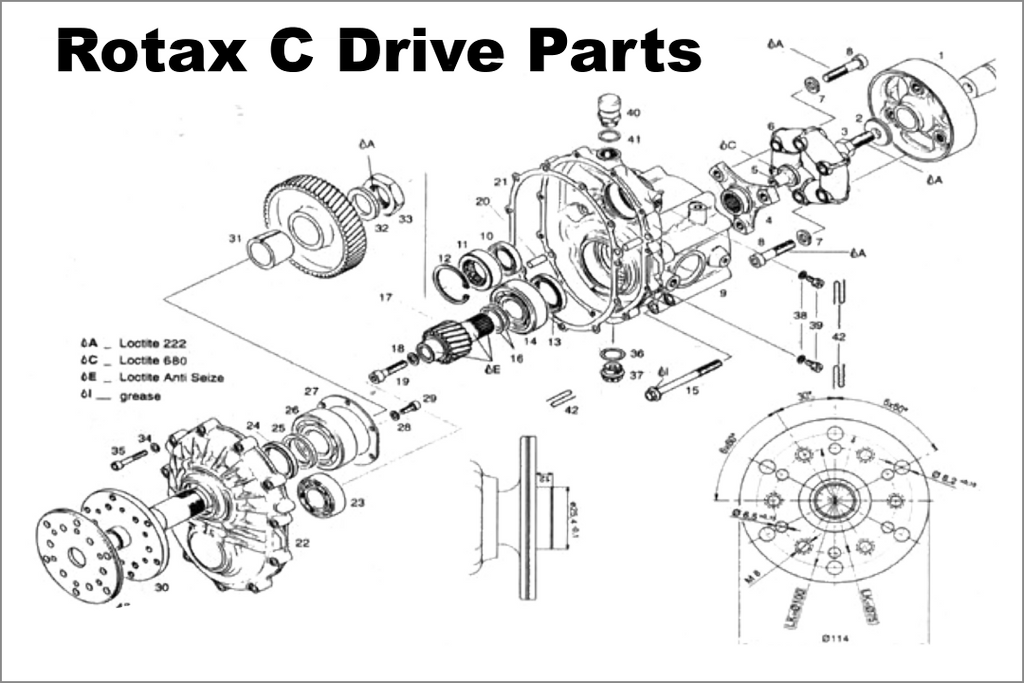
1. Clean and degrease the crankshaft end and mounting holes on the crankcase before starting.
2. Using the Rotax fixation tool (876 640) supplied in the Rotax tool kit lock the engine up by installing the pin into the impulse hole, used to run the fuel pump. With the pin in place rotate the engine, until it locks.
3. Install flywheel onto crankshaft end. Install flat washer onto bolt install bolt.. Torque to 45 FOOT lbs.
4. Install allen screws with washers into hardee disc. Install Hardee disk onto crankshaft as shown. Use loctite 242 on bolt threads. Toque to 30 FOOT lbs. While torqueing use a 17 mm wrench to prevent special flat sided washers from turning.
5. If Hardee disc is banded remove band..
6. Install back half of gear box housing onto engine with the 8 bolts provided. Apply loctite 242 to bolt threads before installing. Torque to 195 INCH lbs.
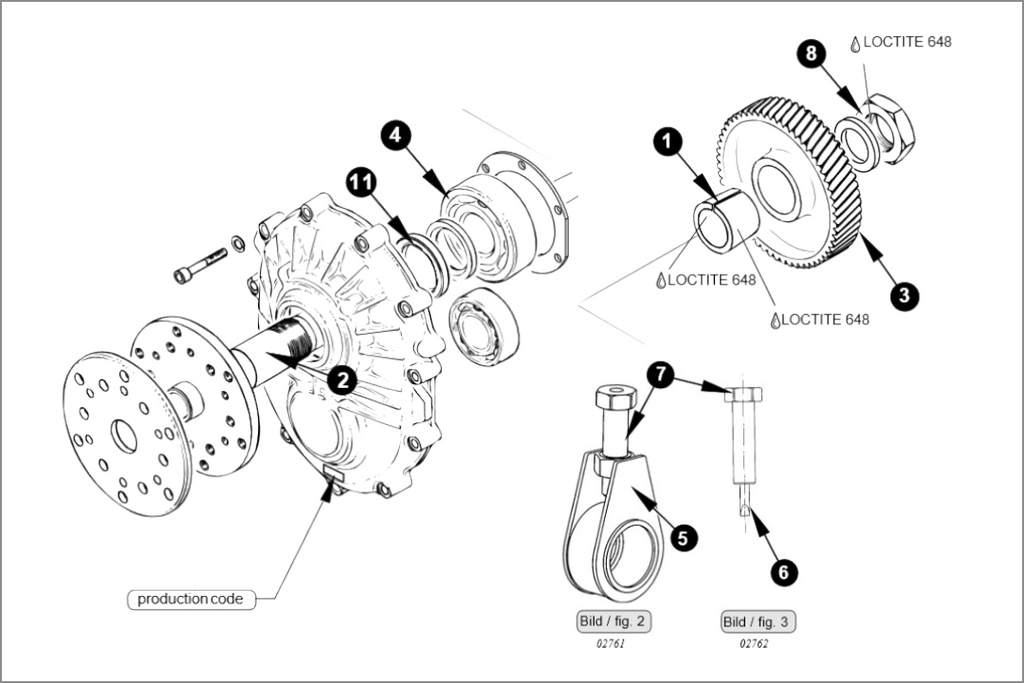
7. Install #16 shims onto the pinion shaft.
8. Install anti-seize compound onto pinion shaft, and install #4 coupling flange.
Torque allen bolt located in the center of the flange to 195 INCH lbs.
9. Install gasket (#21) - install front gear box housing and prop shaft onto rear housing. Torque all 6 mm fasteners in an X pattern to 95 INCH lbs.
10. Remove fixation tool from impulse hole.
11. Fill gear box with 90 weight oil until oil runs out the lower of the two side plugs (about 4 ounces).
12. Tighten then safety wire top and bottom plugs.
13. Tighten then safety wire vent cap and drain plug.
For the Rotax "C" drive gear box, lubrication oil level is very critical.
When servicing, fill slowly to the lower of the two screw holes on the side of the case (#39), and then replace the screw and washer, and safety wire the two oil level screws.
On new gear boxes, change oil after the first 10 hours of operation and then every 100 hours after that.
Rotax redrive gears must always be replaced together, this is because of the gears have worn together as a unit and replacing one would only result in premature wearing of the both gears.
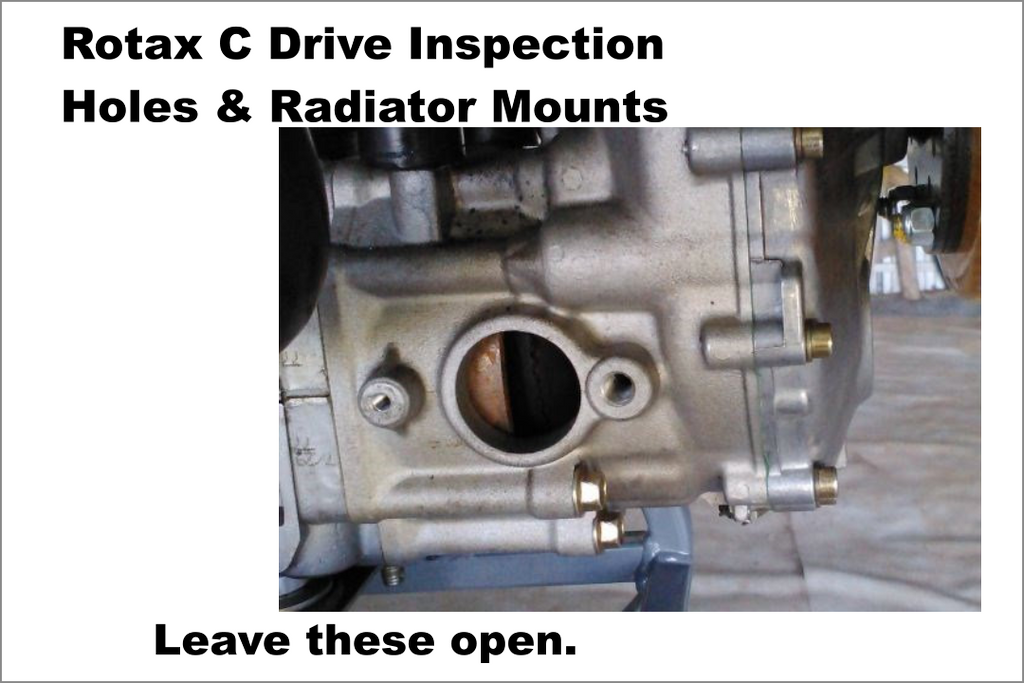
The two large holes on the side of the Rotax "C" drive gear box, (where you can look in and see the rubber coupler) are for cooling of the rubber shock mount, inside the drive system and must be left open.
If there is evidence of gear oil on the bottom of the gear box where it meets the crankcase, or in the two holes referred to above this could indicate a failed seal (#13) inside the gear box.