| Things you should know when using or installing
a Rotax electric start. Several electric starters are available for
the Rotax 532/582 engine. The only one that I recommend is the Rotax
supplied starter.
For
more information click here.
The starter should be used with a minimum
20 amp hour battery. The battery leads should be no more than 5 feet
in length. and a separate ground cable must be run to the engine
from the airframe, to ensure proper ground.
Several owners have reported burning up
their engine wiring system when they failed to follow instructions
and properly ground the engine.
This is caused by the single small ground
wire that is grounded to the coil mounting bolts, melting in the
wiring harness, fusing wires together when the engine is cranked.
This wire is not large enough to carry the kind of current
necessary.
When using an electric start on a Rotax
aircraft engine TWO grounds are required, one going from the engine
to the airframe and another going from the engine to the negative
side of the battery.
These ground cables should be about the
same diameter as that used on a GOOD set of booster cables, that you
would use to jump start your car. (In many cases that is what pilots
have used).
Other pilots have reported failure of the
starter solenoid supplied with the Rotax starter. It would appear
that this failure is caused by improper mounting of the solenoid.
The solenoid should be mounted in free air away from vibrations, and
as close to the engine as possible.
I don't even recommend using the solenoid
that is USUALLY supplied with the starter from Rotax. Instead drop
into your local Canadian Tire store or a good automotive supply
center and get a solenoid for a Ford car, or truck. It can usually
be found on the fender. I have never had one of these fail and it
can be purchased locally.
Another reported problem with the starter
is the failure of the studs used to secure the starter to the ring
gear housing. If your starter is mounted in any position other than
the 6 o'clock position failure of the stud will result in the two
big washers found on the end of the stud falling into the magneto.
The washers are then picked up by the magnets with catastrophic
results. Usually destroying the crankcases and ignition system.
|
 |
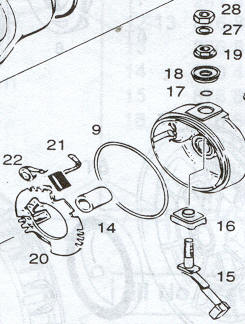
9 - Stud 841 950 |
| 13 - O ring 850 585 |
| 14 - O ring 230 260 |
|
To help prevent this it is suggested that
the starter only be mounted in the six o'clock position. If the
studs break in this position the washers would fall harmlessly to
the ground.
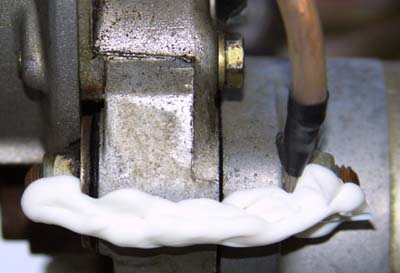
However I also suggest that you run a bead
of silicone from one end of each stud to the other end, including over the casing. This
way if the stud fails you still have the washers, and ALL of the
little rubber shock absorbers that are on the studs [about $60 worth
of parts].
end of each stud to the other end, including over the casing. This
way if the stud fails you still have the washers, and ALL of the
little rubber shock absorbers that are on the studs [about $60 worth
of parts].
If you have had to replace the studs, or
have done other work which requires removal of the starter motor,
remember that there is suppose to be a TWO millimetre gap between
the starter and ring gear housing.
Rotax has also updated the ring gear on the
electric start the new gears are slightly thicker. The older gears
were found to crack and fail around the gear teeth. Rotax also
updated the spacer used to support the ring gear. The older spacers
only had three support fingers while the new supports have five
support fingers.
Some owners have reported finding their
ring gear housing breaking at the point where the stud runs through
the housing. This can usually be traced to a succession of hard
landings, or to the starter striking something on the airframe
during acceleration.
The only other problem I have heard of is
slow cranking starters, or starters that will no longer crank. This
problem can be traced to the starter brushes. One brush can be
replaced easily The other requires the purchase
of the complete plate assembly.
|
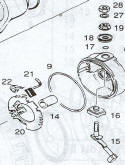 |
20-22
Brush holder with springs |
866 890 |
15
Carbon brush with screw |
866 892 |
|
|
While not an electric start problem, the
use of the proper regulator rectifier on the 582/618 can lead to the
battery going flat, and the electric start not working.
While the 532 can use the CHEAPER regulator
rectifier the 582/618 require the use of the more expensive
regulator. The reason for this is that the NEW 503/582/618 put
out considerably more charging power than the old 377/447/503's
532's.
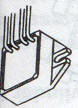
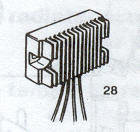
This translates to more HEAT in the
regulator/rectifier. The more expensive regulator/rectifier is
larger and has aluminum fins which are used to dissipate this heat.
Also check out Ducati
wiring diagram
|